See the supported connectors for Application Integration.
Build integrations with Gemini
Gemini Code Assist is an AI-powered collaborator in Google Cloud that provides help to users of all skill levels where they need it. In Application Integration, Gemini Code Assist can assist you to do the following:
- Create and build integrations
- Configure connector tasks in an integration
- Add edge conditions and append additional tasks to an integration
- Generate integration description
For detailed information about Gemini in Google Cloud, see Gemini.
Gemini doesn't use your prompts or its responses as data to train its models. For more information, see How Gemini for Google Cloud uses your data. As an early-stage technology, Gemini can generate output that seems plausible but is factually incorrect. We recommend that you validate all output from Gemini before you use it. For more information, see Gemini for Google Cloud and responsible AI.
Before you begin
- Enable the Gemini APIs:
- In the Google Cloud console, go to the Application Integration page.
The following image shows the Application Integration page:

- In the Get AI to build your integrations section, click Explore.
- In the Gemini in Application Integration pane that appears, click Enable Service to enable the Cloud AI Companion Service.
For information about activating Gemini Code Assist in a Google Cloud project, see Set up Gemini Code Assist for a project.
- In the Google Cloud console, go to the Application Integration page.
- Set up Application Integration in your Google Cloud project. For more information, see Set up Application Integration.
- If you plan to build your integration using connectors, ensure to configure the desired connections in your Google Cloud project.
Supported tasks and triggers
Gemini can assist you to add the following tasks and triggers:| Triggers | Tasks |
|---|---|
Gemini also assists you to create the following control flow tasks but can't generate sub-integrations:
|
Create and build integrations
Gemini assists you to create and build integrations using your natural language statements (or prompts) as input. This allows you to create and build simple to complex integrations quickly and with minimal manual configurations.
Provide Gemini a brief prompt or description of the integration flow that you intent to build and Gemini will suggest one or more integration flows to help you get started.
To build an integration using Gemini, perform the following steps:
- In the Google Cloud console, go to the Application Integration page.
- In the navigation menu, click Integrations.
The Integrations page appears listing all the integrations available in the Google Cloud project.
- Click Create integration to create a new integration.
The Create Integration page appears.
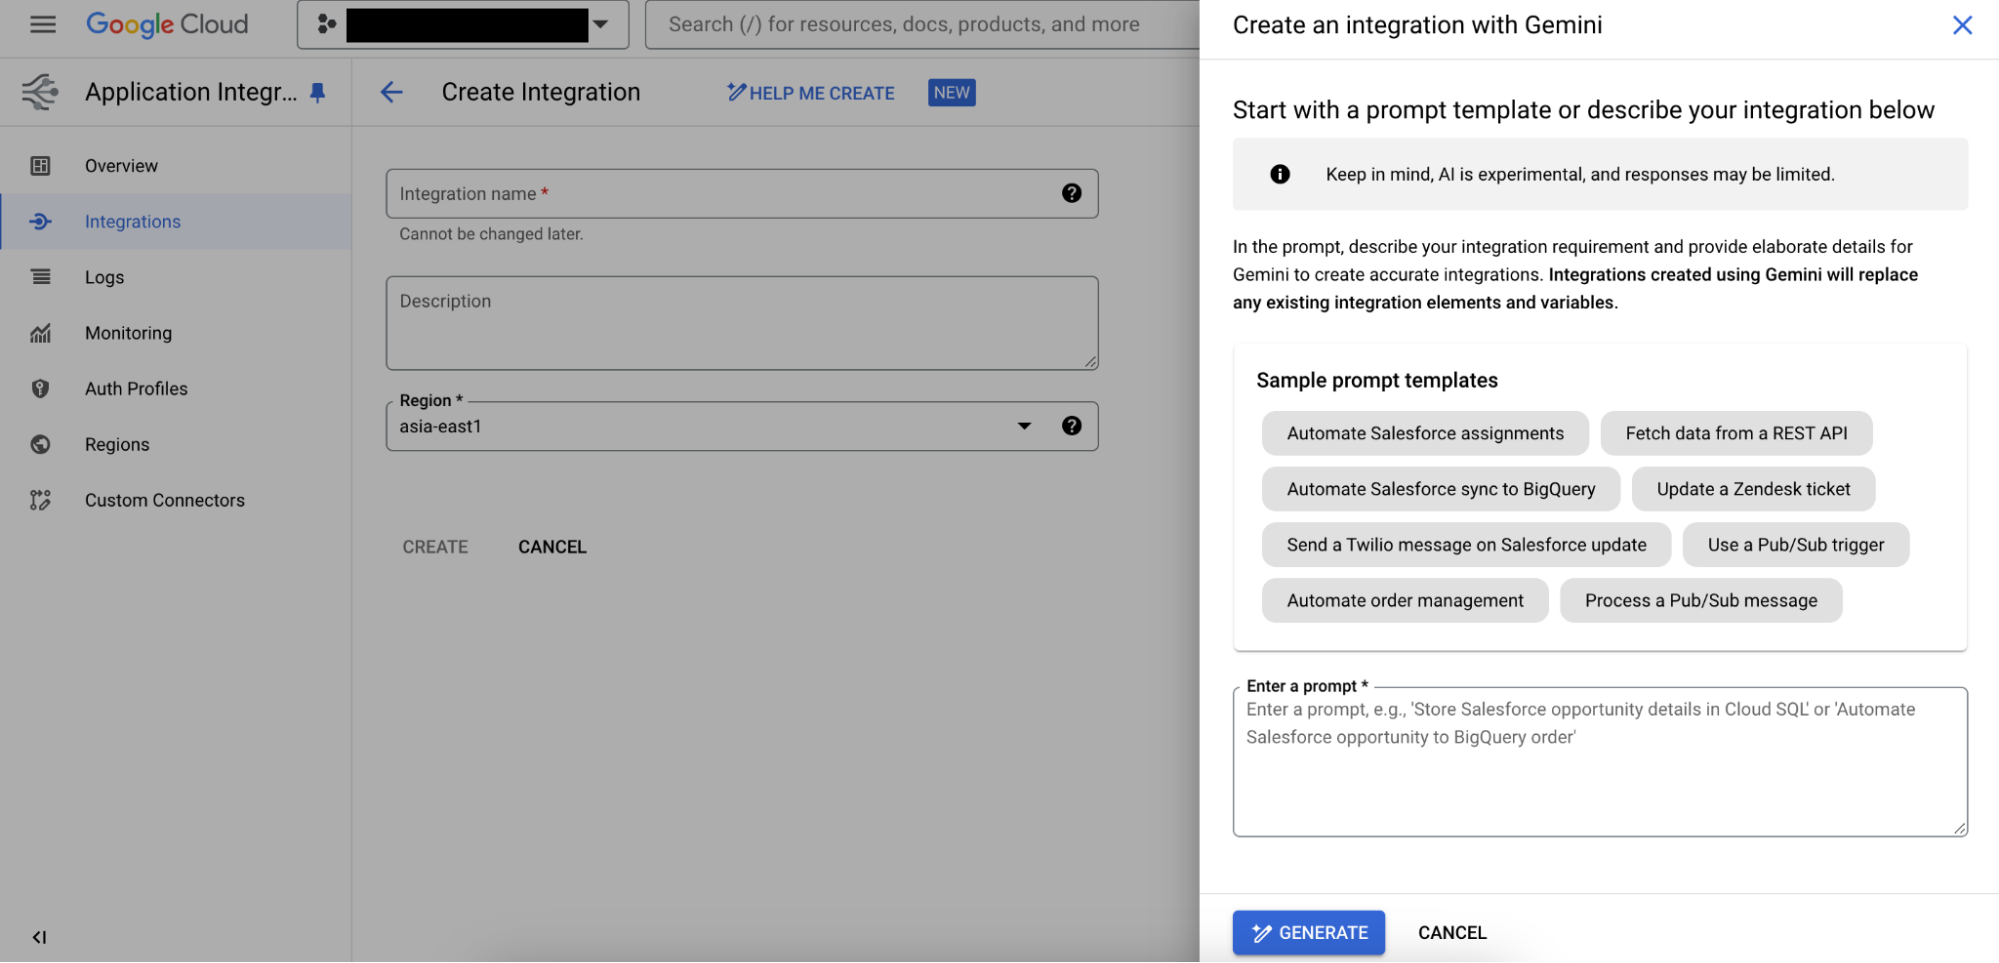
- Click pen_spark Help me create. The Create Integration with Gemini pane appears.
Alternatively, on the Create Integration page, create a new integration and then on the integration editor, click pen_spark Create integration flows with Gemini to use Gemini.
- If you want to select a prompt template, select one from the Sample prompt templates. Otherwise, enter a prompt for Gemini to generate integrations. To see a list of tasks and triggers that are supported with Gemini, see Supported tasks and triggers.
- Click Generate.
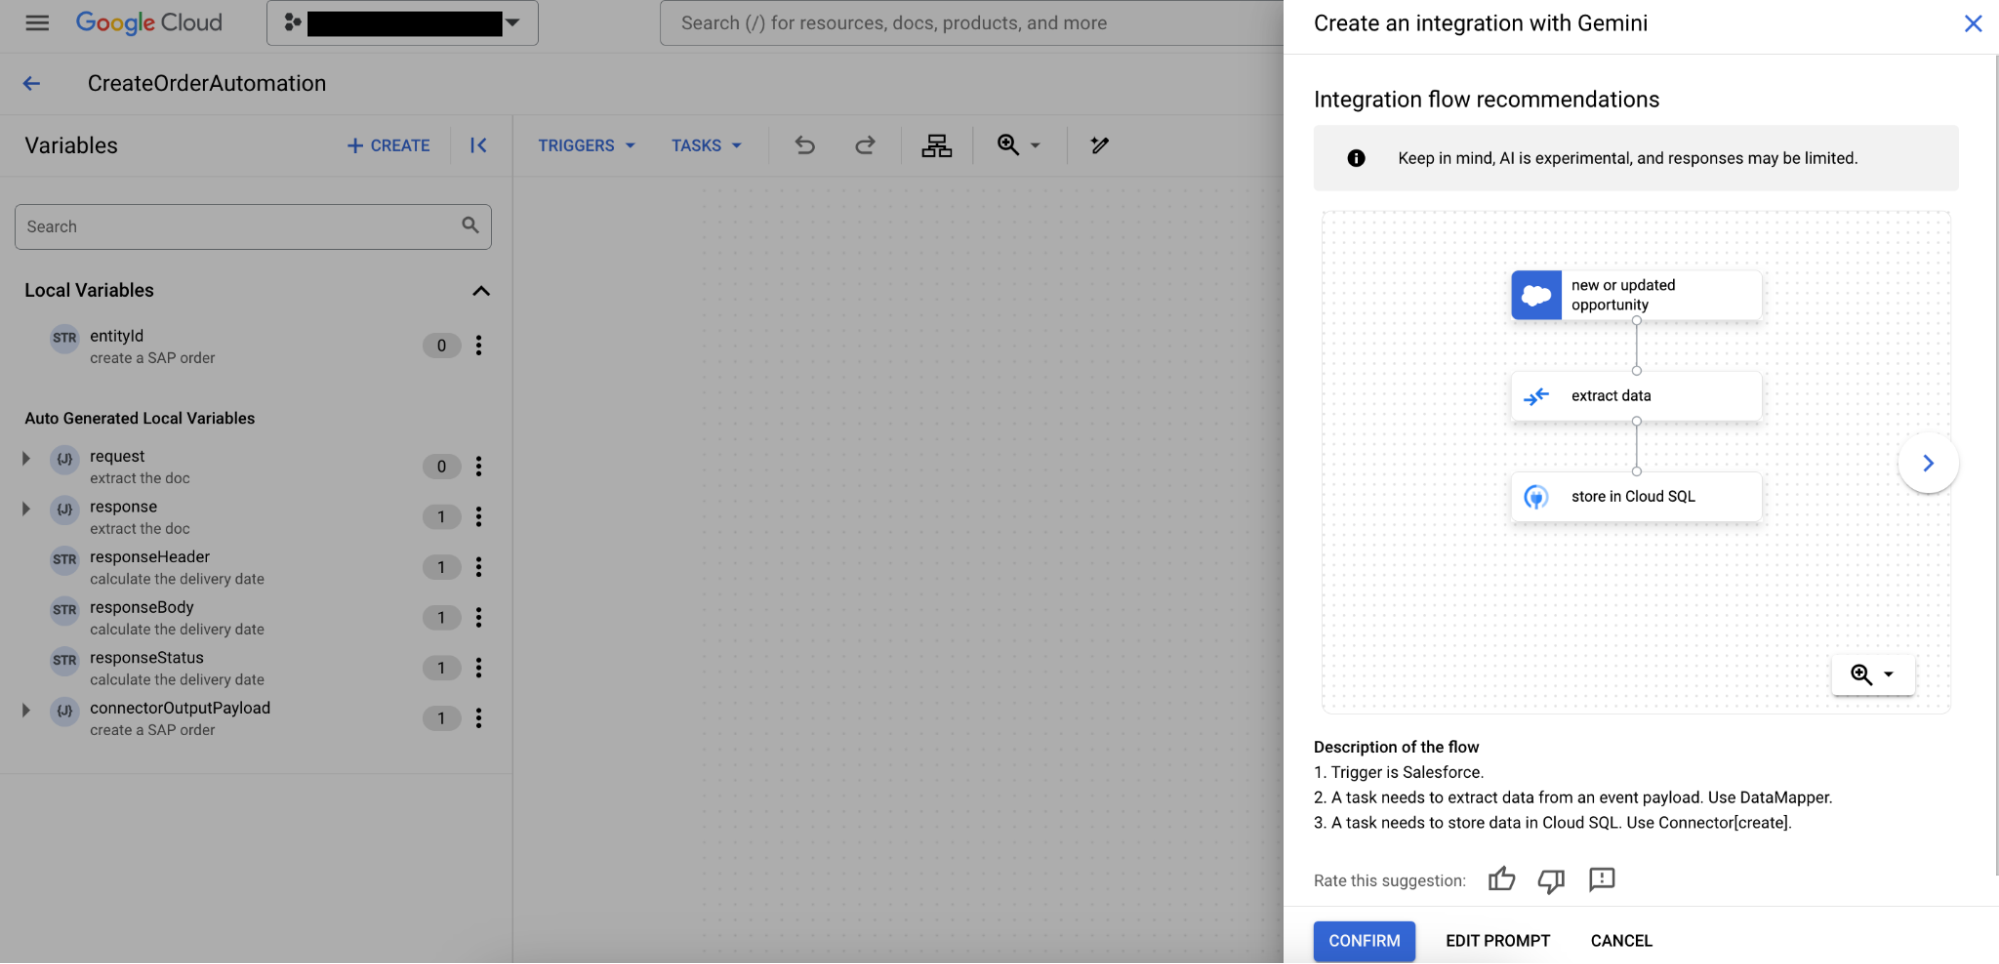
Gemini suggests one or more integration flows that qualifies your prompt. Use the navigate_before Previous and navigate_next Next buttons to view the suggestions provided.
- Enter a name for the integration.
- Select a region for the integration. If your project has a single provisioned region, then the Region field is set to that region.
- If you want to edit the prompt, click Edit Prompt.
- If you want to regenerate the prompt, click Regenerate.
- To accept an integration flow suggestion, click Confirm.
Integrations created using Gemini replaces any existing integration elements and variables.
Configure connector tasks
Gemini can assist you to provide contextually appropriate connector configuration recommendations based on the logical flow of your existing integration. If a connection in your integration has more than 1000 entities, then that connector isn't included in the recommendations by Gemini. For more limitations, see Limitations.
You can configure connector configuration with the Gemini recommended replacements, or you can interact with Gemini (using prompts) and ask for the desired configuration suggestions.
To configure a connector task in your integration using Gemini, perform the following steps:
- In the Google Cloud console, go to the Application Integration page.
- In the navigation menu, click Integrations.
The Integrations page appears listing all the integrations available in the Google Cloud project.
- Select an existing integration to open it in the integration editor.
- In the integration editor, select the connector task that you want to configure and in the configuration pane, click Use Gemini.
A pop-up menu, similar to the following image, appears displaying a set of Gemini recommendations.
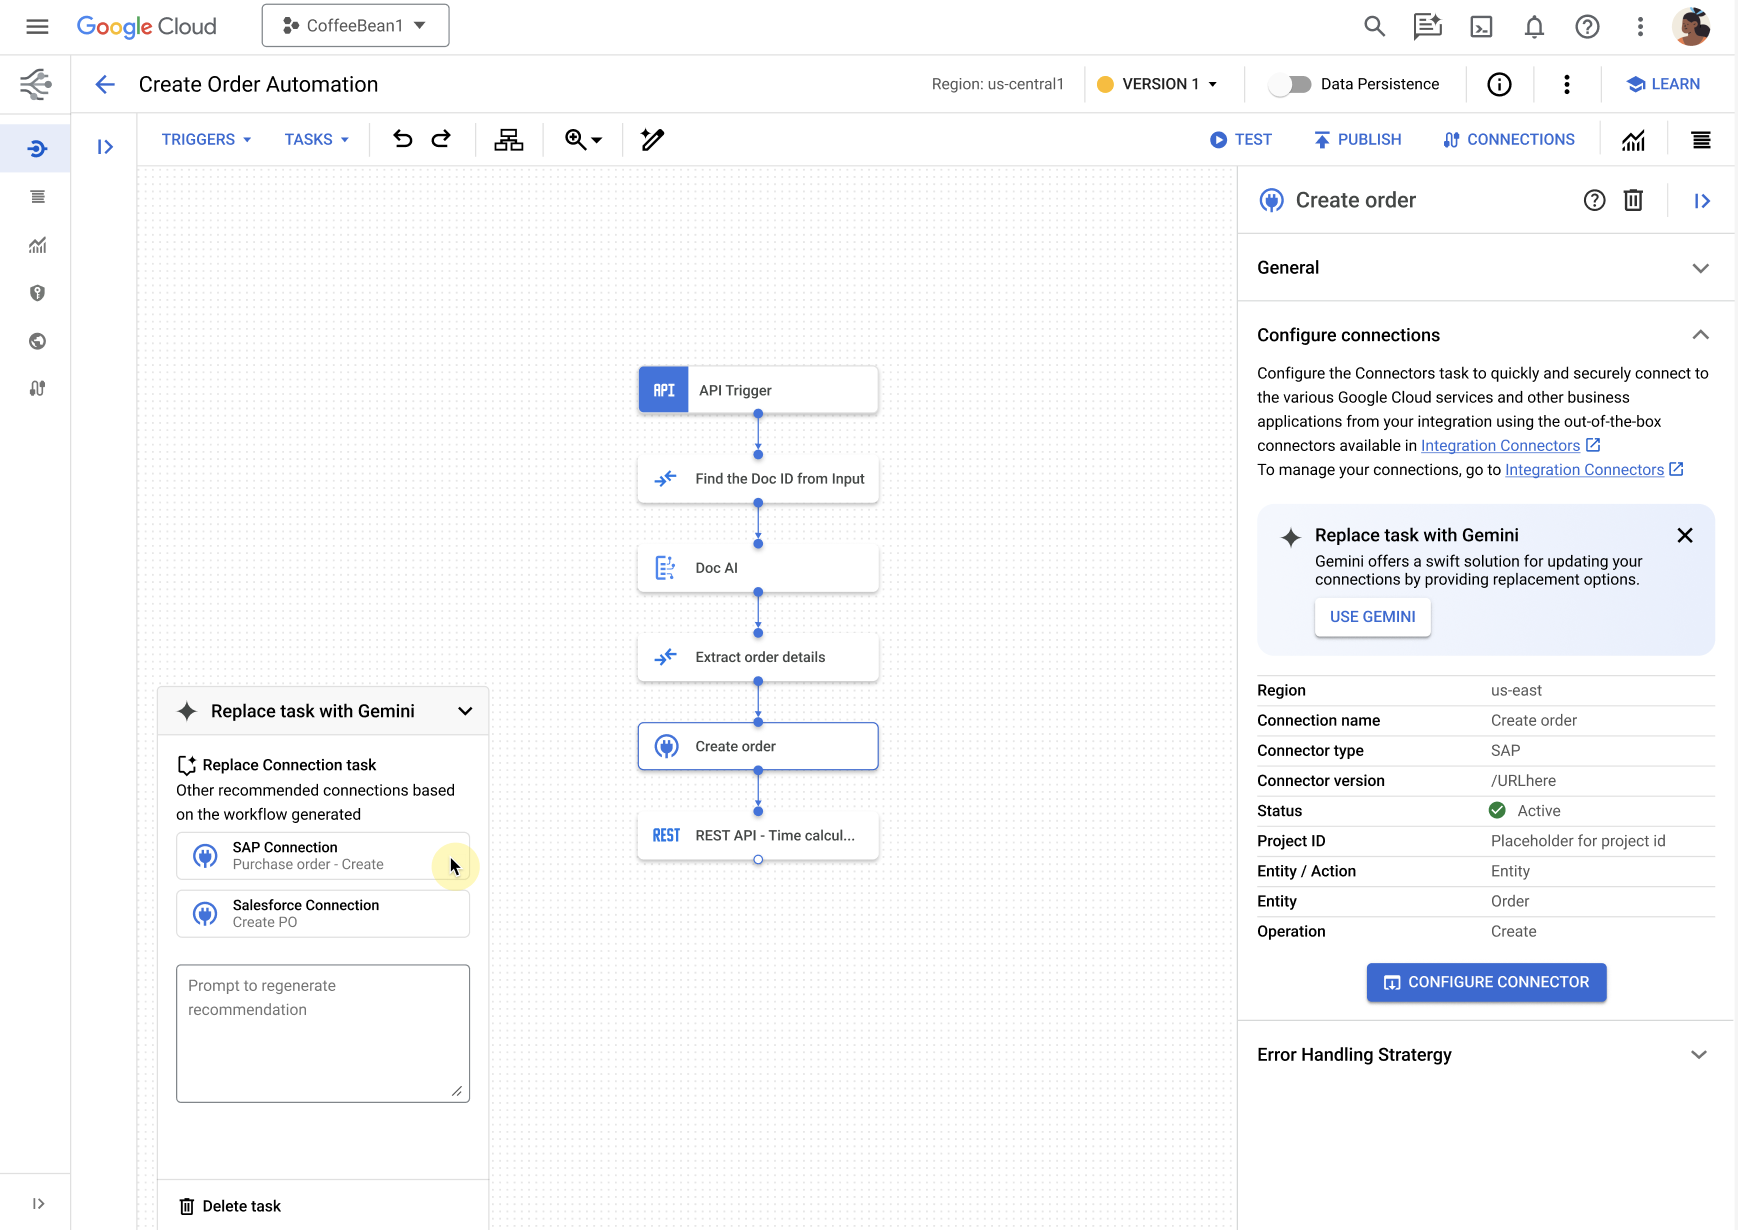
- Gemini automatically recommends one or more replacements or alternatives relevant to the logical flow of your integration. You can use the prompt input to interact with Gemini and fine-tune or re-generated the suggested recommendations if desired.
- Select any one of the recommended replacements or modifications to accept. Gemini configures the selected connector task.
Add edge conditions and append additional tasks
You can use Gemini to append new tasks and to add edge conditions to your existing integration flow.
To add an edge condition or to append new tasks to your integration using Gemini, perform the following steps:
- In the Google Cloud, go to the Application Integration page.
- In the navigation menu, click Integrations.
The Integrations page appears listing all the integrations available in the Google Cloud project.
- Select an existing integration to open it in the integration editor.
- In the integration editor, select the edge for which you want to add the edge condition or from which you want to append a new task. In the configuration pane, click Use Gemini.
A pop-up menu, similar to the following image, appears prompting you to provide an input.

- Enter your prompt specifying the edge condition that you want to add or the additional task that you want to append.
Here is a sample prompt that you can use:
If order qty>100, send an email - Click pen_spark Create.
- Click Confirm to accept the sugessted insertions and additions.
If you din't like the suggested inserts or additions, click Cancel .
Gemini automatically inserts the qualified edge conditions and configures the additional tasks from the selected edge in your existing integration.
Generate integration description
The integration description feature available in Gemini in Application Integration provides a description summary of the integration that you've created in your integration editor. The integration description summary is generated in plain language and can help you in understanding the overall integration use case, underlying orchestration, and business context which might be difficult to assess due to the structure or complexity of an integration.
To generate an integration description summary of your integration using Gemini, perform the following steps:
- In the Google Cloud console, go to the Application Integration page.
- In the navigation menu, click Integrations.
The Integrations page appears listing all the integrations available in the Google Cloud project.
- Select an existing integration to open it in the integration editor.
- In the integration editor toolbar, and click (Integration summary). The integration details page appears.
- In the integration details page, click Help me with description.
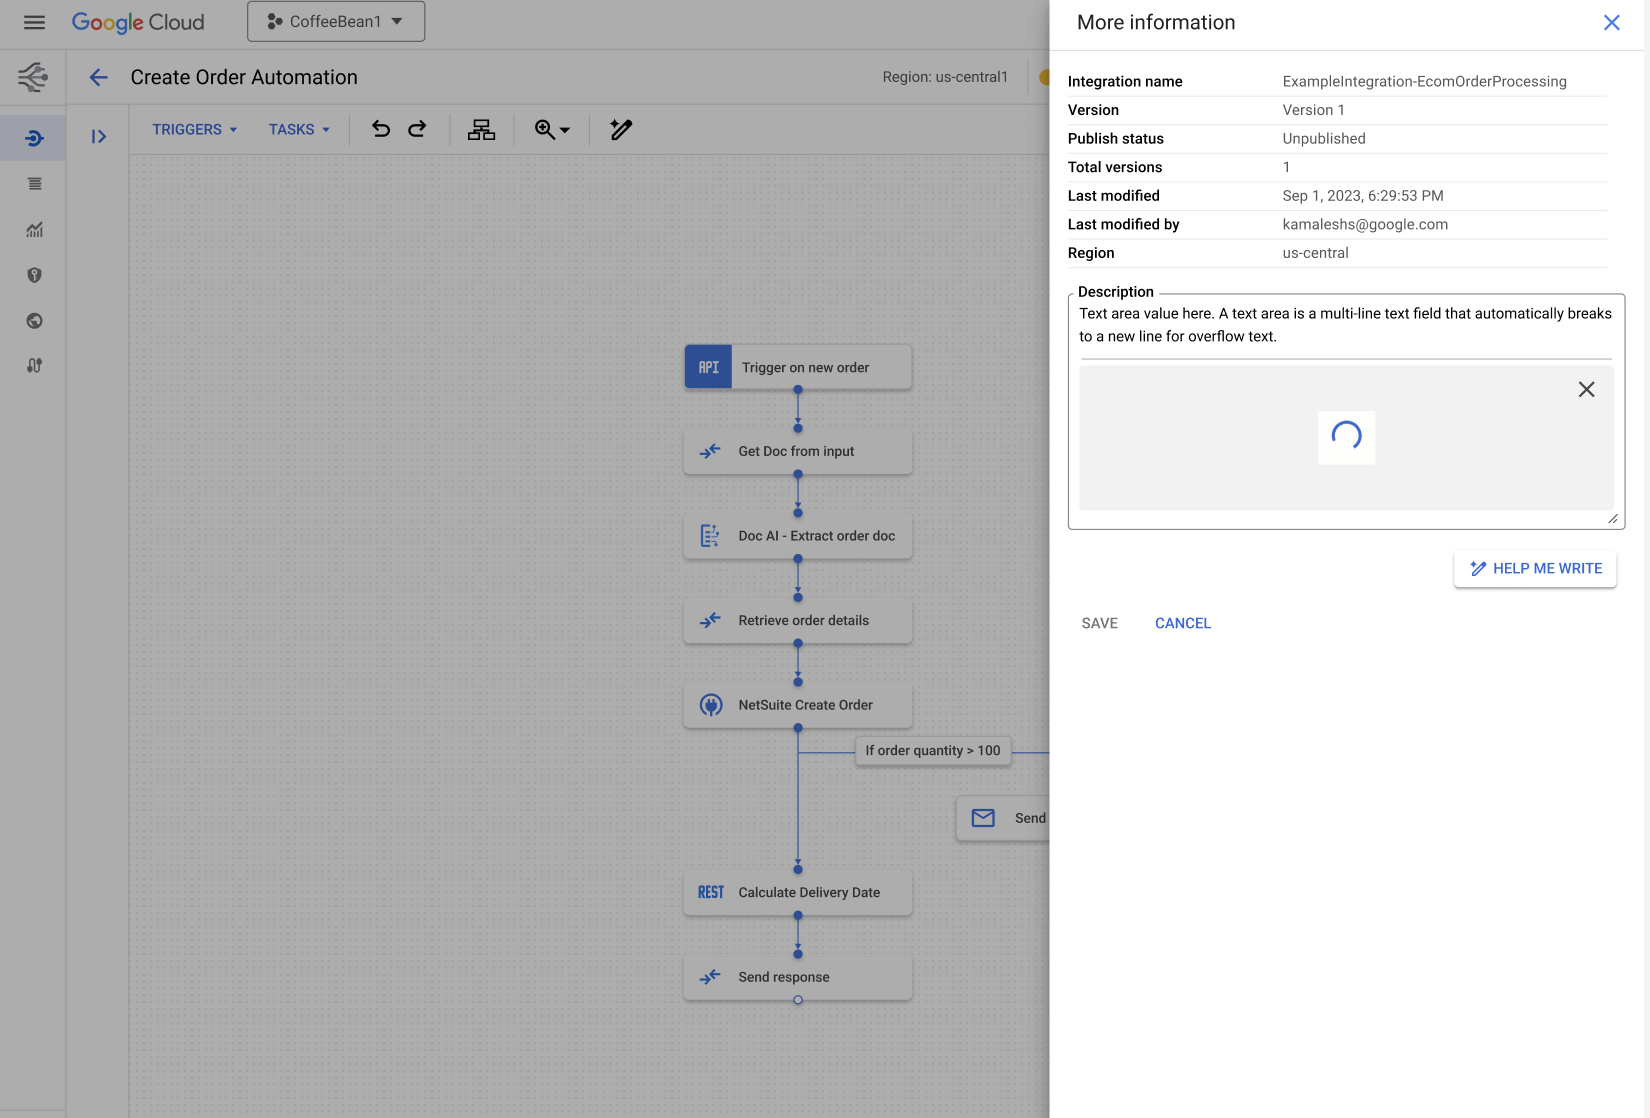
Gemini parses through the integration in your integration editor and generates a detailed summary description similar to the following image.
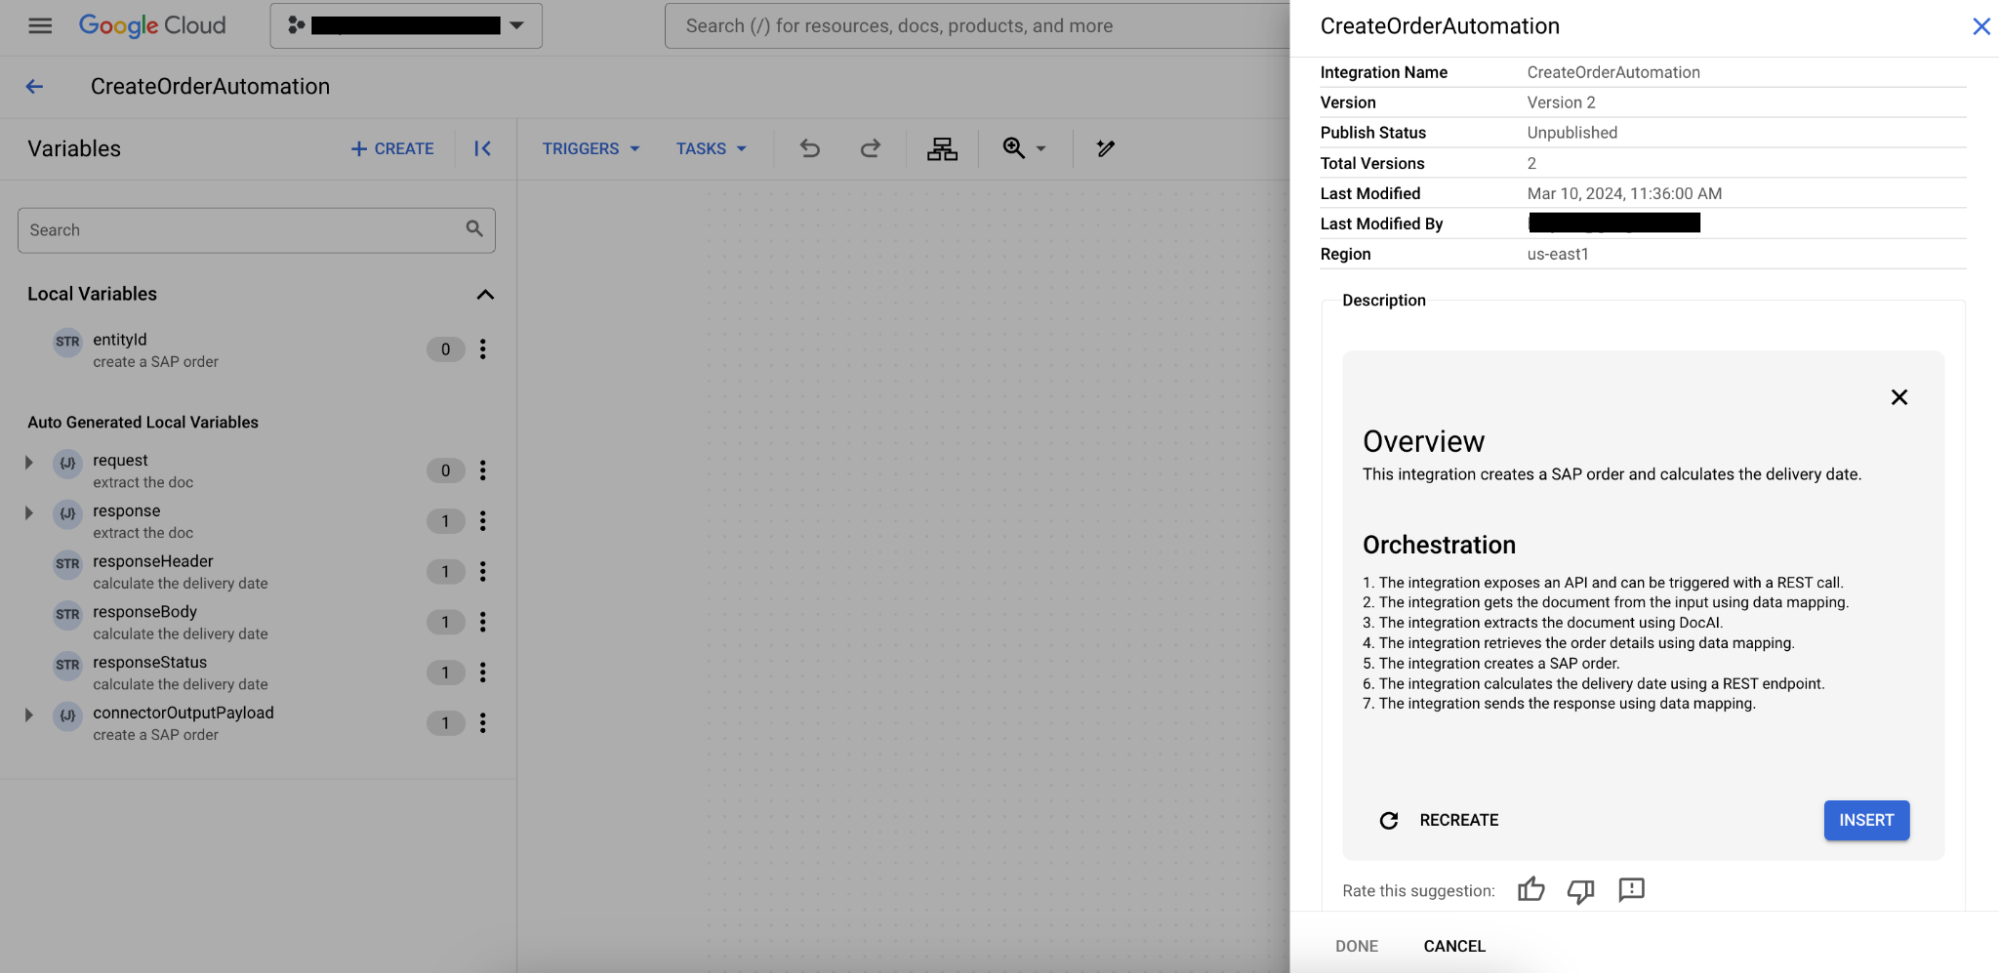
- Click Save to accept the generated integration description.
Verify and validate the integration (including the variables) before running it.
Limitations
Gemini in Application Integration is subject to the following limitations:
- If the connection in your integration has more than 1000 entities, then that connector isn't included in the recommendations by Gemini.
- Application Integration supports data residency. Integrations that are built using Gemini support data residency. We don't store any data such as prompts and Gemini responses. Only data in use and transit for generation using Gemini doesn't support data residency.
Provide feedback
You can get support or provide contextual feedback while using Gemini for building integration. This information helps us improve Gemini.