This page shows you how to connect to a runtime in Colab Enterprise.
To run code in your notebook, you must connect to a runtime. A runtime is a compute resource that runs your code.
Before you begin
- Sign in to your Google Cloud account. If you're new to Google Cloud, create an account to evaluate how our products perform in real-world scenarios. New customers also get $300 in free credits to run, test, and deploy workloads.
-
In the Google Cloud console, on the project selector page, select or create a Google Cloud project.
-
Make sure that billing is enabled for your Google Cloud project.
-
Enable the Vertex AI, Dataform, and Compute Engine APIs.
-
In the Google Cloud console, on the project selector page, select or create a Google Cloud project.
-
Make sure that billing is enabled for your Google Cloud project.
-
Enable the Vertex AI, Dataform, and Compute Engine APIs.
Connect by using different methods
This page shows you how to connect to a runtime by using the following methods:
Use the default runtime
This section describes how to connect to the default runtime.
Required roles
To ensure that your user account has the necessary
permissions to connect to the default runtime in a Colab Enterprise notebook,
ask your administrator to grant your user account the
Colab Enterprise User (roles/aiplatform.colabEnterpriseUser)
IAM role on the project.
For more information about granting roles, see Manage access.
Your administrator might also be able to give your user account the required permissions through custom roles or other predefined roles.
Connect to the default runtime
When you run code in a notebook for the first time, Colab Enterprise automatically connects to the default runtime unless you specify a different one.
To connect to the default runtime without running code, do the following:
-
In the Google Cloud console, go to the Colab Enterprise Notebooks page.
-
In the Region menu, select the region that contains your notebook.
-
On the My notebooks tab, click the notebook that you want to open. If you haven't created a notebook yet, create a notebook.
-
In your notebook, click Connect.
-
If this is your first time connecting to a runtime with end-user credentials enabled, a Sign in dialog appears.
To grant Colab Enterprise access to your user credentials, complete the following steps:
-
In the Sign in dialog, click your user account.
-
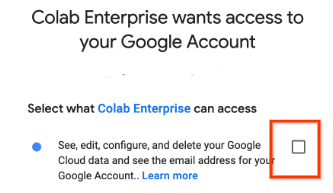
Select See, edit, configure, and delete your Google Cloud data... to grant Colab Enterprise access to your user credentials.
-
Click Continue.
-
Colab Enterprise connects to the default runtime. If the default runtime isn't running, Colab Enterprise starts the default runtime, and then connects to it.
Connect to an existing runtime
This section describes how to connect to an existing runtime by using the Connect to Vertex AI runtime dialog.
Required roles
To ensure that your user account has the necessary
permissions to connect to an existing runtime in a Colab Enterprise notebook,
ask your administrator to grant your user account the
Colab Enterprise User (roles/aiplatform.colabEnterpriseUser)
IAM role on the project.
For more information about granting roles, see Manage access.
Your administrator might also be able to give your user account the required permissions through custom roles or other predefined roles.
Connect to the existing runtime
To connect to an existing runtime:-
In the Google Cloud console, go to the Colab Enterprise Notebooks page.
-
In the Region menu, select the region that contains your notebook.
-
On the My notebooks tab, click the notebook that you want to open. If you haven't created a notebook yet, create a notebook.
-
In your notebook, click the Additional connection options expander arrow, and then select Connect to a runtime.
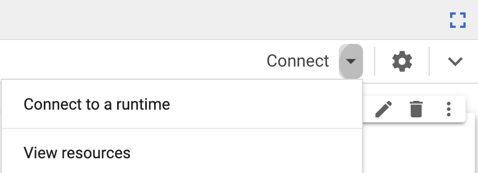
The Connect to Vertex AI runtime dialog opens.
-
For Select a runtime, select Connect to an existing runtime.
-
For Select an existing runtime option, select the runtime that you want to connect to. If there aren't any runtimes in the list, create a runtime or connect to the default runtime.
-
Click Connect.
-
If your runtime has end-user credentials enabled, and this is your first time connecting to a runtime with end-user credentials enabled, a Sign in dialog appears.
To grant Colab Enterprise access to your user credentials, complete the following steps:
-
In the Sign in dialog, click your user account.
-
Select See, edit, configure, and delete your Google Cloud data... to grant Colab Enterprise access to your user credentials.
-
Click Continue.
-
Colab Enterprise connects to the runtime. If the runtime isn't running, Colab Enterprise starts the runtime, and then connects to it.
Create a runtime
This section describes how to create a runtime and connect to it by using the Connect to Vertex AI runtime dialog. Alternatively, you can create a runtime from the Runtimes tab.
Required roles
To ensure that your user account has the necessary
permissions to create a runtime in Colab Enterprise,
ask your administrator to grant your user account the
Colab Enterprise Admin (roles/aiplatform.colabEnterpriseAdmin)
IAM role on the project.
For more information about granting roles, see Manage access.
Your administrator might also be able to give your user account the required permissions through custom roles or other predefined roles.
Create a runtime and connect to it
To create a runtime and connect to it by using the Connect to Vertex AI runtime dialog:-
In the Google Cloud console, go to the Colab Enterprise Notebooks page.
-
In the Region menu, select the region that contains your notebook.
-
On the My notebooks tab, click the notebook that you want to open. If you haven't created a notebook yet, create a notebook.
-
In your notebook, click the Additional connection options expander arrow, and then select Connect to a runtime.
The Connect to Vertex AI runtime dialog opens.
-
For Select a runtime, select Create new runtime.
-
In the Runtime template menu, select a runtime template. If there aren't any runtime templates listed, create a runtime template.
-
In the Runtime name field, enter a name for your runtime.
-
Click Connect.
-
If the runtime template that you selected has end-user credentials enabled, and this is your first time connecting to a runtime with end-user credentials enabled, a Sign in dialog appears.
To grant Colab Enterprise access to your user credentials, complete the following steps:
-
In the Sign in dialog, click your user account.
-
Select See, edit, configure, and delete your Google Cloud data... to grant Colab Enterprise access to your user credentials.
-
Click Continue.
-
Colab Enterprise starts the default runtime, and then connects to it.
Troubleshoot
This section shows you how to resolve issues with connecting to runtimes in Colab Enterprise.
Unable to connect to a runtime
This issue occurs due to several reasons. The most common causes are:
Browser blocks third party cookies
The browser that you are using is blocking a third party cookie that Colab Enterprise uses to establish an HTTPS connection with the runtime.
To resolve this issue, configure your browser's settings to
allow the DATALAB_TUNNEL_TOKEN third party cookie from the domain
*.aiplatform-notebook.googleusercontent.com.
Network blocks outbound traffic to notebook domains
Your network's firewall rules block outbound traffic to
*.aiplatform-notebook.cloud.go888ogle.com.fqhub.com or
*aiplatform.googleapis.com.
To resolve this issue, configure your network's firewall rules
to allow outbound traffic to *.aiplatform-notebook.cloud.go888ogle.com.fqhub.com
and *aiplatform.googleapis.com.
What's next
- Learn more about runtimes and runtime templates.
- Create a runtime template.